Hatch Interior Latch
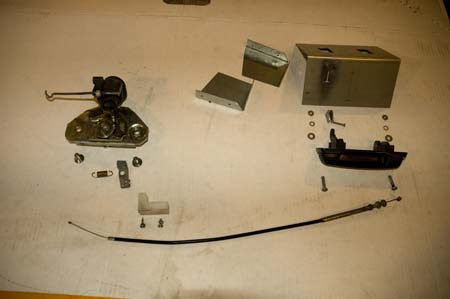
The Parts
Parts Dimensions
On the left is the latch mechanism bolted to the exterior pushbutton, as it would be assembled inside the hatch. The wire projecting from the left connects to the central locking motor
Centred below that is the latch return spring and the new lever piece. This piece fits over the pin and is held on by the return spring.
Below that is the nylon block which holds the outer cable firmly to the hatch. It screws inside the bottom edge of the hatch.
Below that is a bicycle cable of indeterminate origin or function, about 18" long. The ball on the left end hooks into the notch on the lever. It has adjusting nuts built onto the right end.
On the top right is the steel mount for the handle, made of 18ga steel. Because it is rather thin, extra stiffeners were made to rivet into the right angle. The outer cable bolts into the smaller hole at the top of the vertical slot.
Below that is the clevis and pin to connect the inner cable to the handle. The handle is from a Nissan Sentra driver side rear sliding door, but many other brands or models could be used. This handle originally PUSHED the door mechanism, but was converted to PULL by drilling a small hole through the protruding tab.
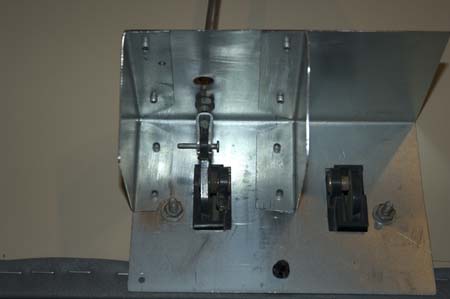
Latch Pull Mechanism
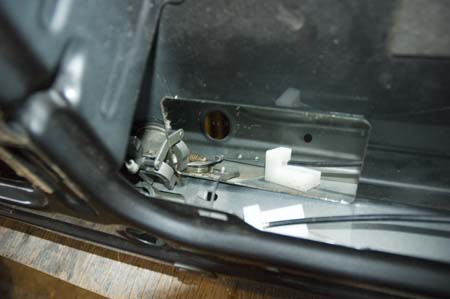
This view is in a mirror inside the bottom of the hatch. The lever is mounted on the original latch mechanism and the spring refitted. The ball of the inner cable is hooked into the lever. The outer cable is held firmly in place by the nylon block, screwed to the bottom edge of the hatch.
Another View
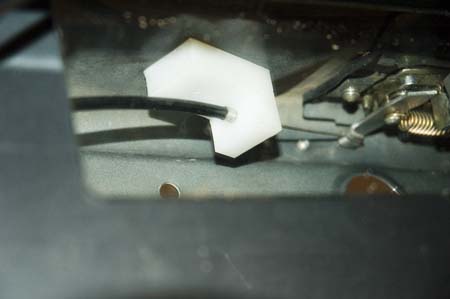
Another mirror shot of the workings. Because the latch mechanism can still move independently of the lever and cable, all regular functions of the locks still work as originally.
There is no drilling or welding needed to fit the lever to the lock mechanism. The only modifications made to the hatch are the two small screw holes to hold the nylon block in place and two rectangular holes cut in the trim panel.
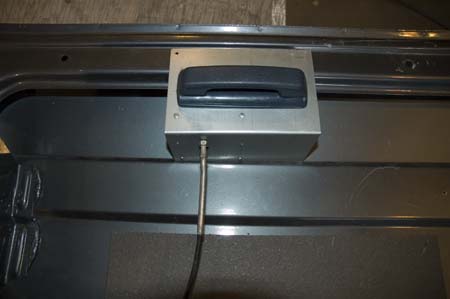
Handle Mount
Before the hatch trim panel is fitted, the handle is test fastened to its steel mount. The centre of the handle is approximately 18" from the left side of the hatch in order to clear the builtin cupboard. It is low enough to allow the curtains to be pulled across, and high enough to clear the mattress and blankets.
No cuts or holes were made in the hatch. A hole will be drilled in the handle mount to line up with the panel attachment plastic button.
Inside the Handle Mount
The two stiffeners were pop-rivetted to the mount. Then the trim panel was cut to allow the two projections of the handle to fit through. Finally, two bolts pass through the handle, the trim panel, the mount and washers and nuts inside. This means that the handle cannot be removed without removing the trim panel first.
The clevis and pin is visible, as well as the inner adjusting nut of the outer cable. The system is adjusted before the trim panel complete with handle is installed in the hatch.
The black plastic trim panel button can be seen protruding through the metal mount.

Handle Fitted
After a coat of black plastic paint, the handle looks like a factory installation.
This handle protrudes about 25mm (1") from the trim panel. There are probably hundreds of other possible ways of mounting a handle on the hatch. Some could be mounted behind the trim panel, leaving a flush surface to the panel. It all depends on what you can find at your local wreckers.
The secret of making the installation easy is the small lever made to fit over the existing pin on the lock mechanism.
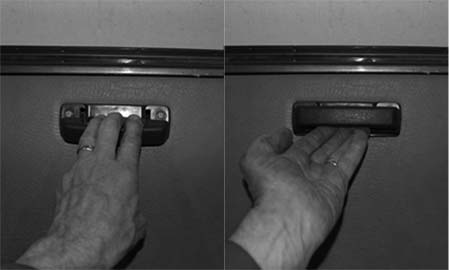
Opening & Closing
To open the hatch from inside the van, the handle is pulled down and the hatch pushed outwards. There is a recessed finger grip on the top of the handle.
To close the hatch from inside, the hatch is pulled down and in using the recessed finger grip on the bottom of the handle.