12 Volt Power
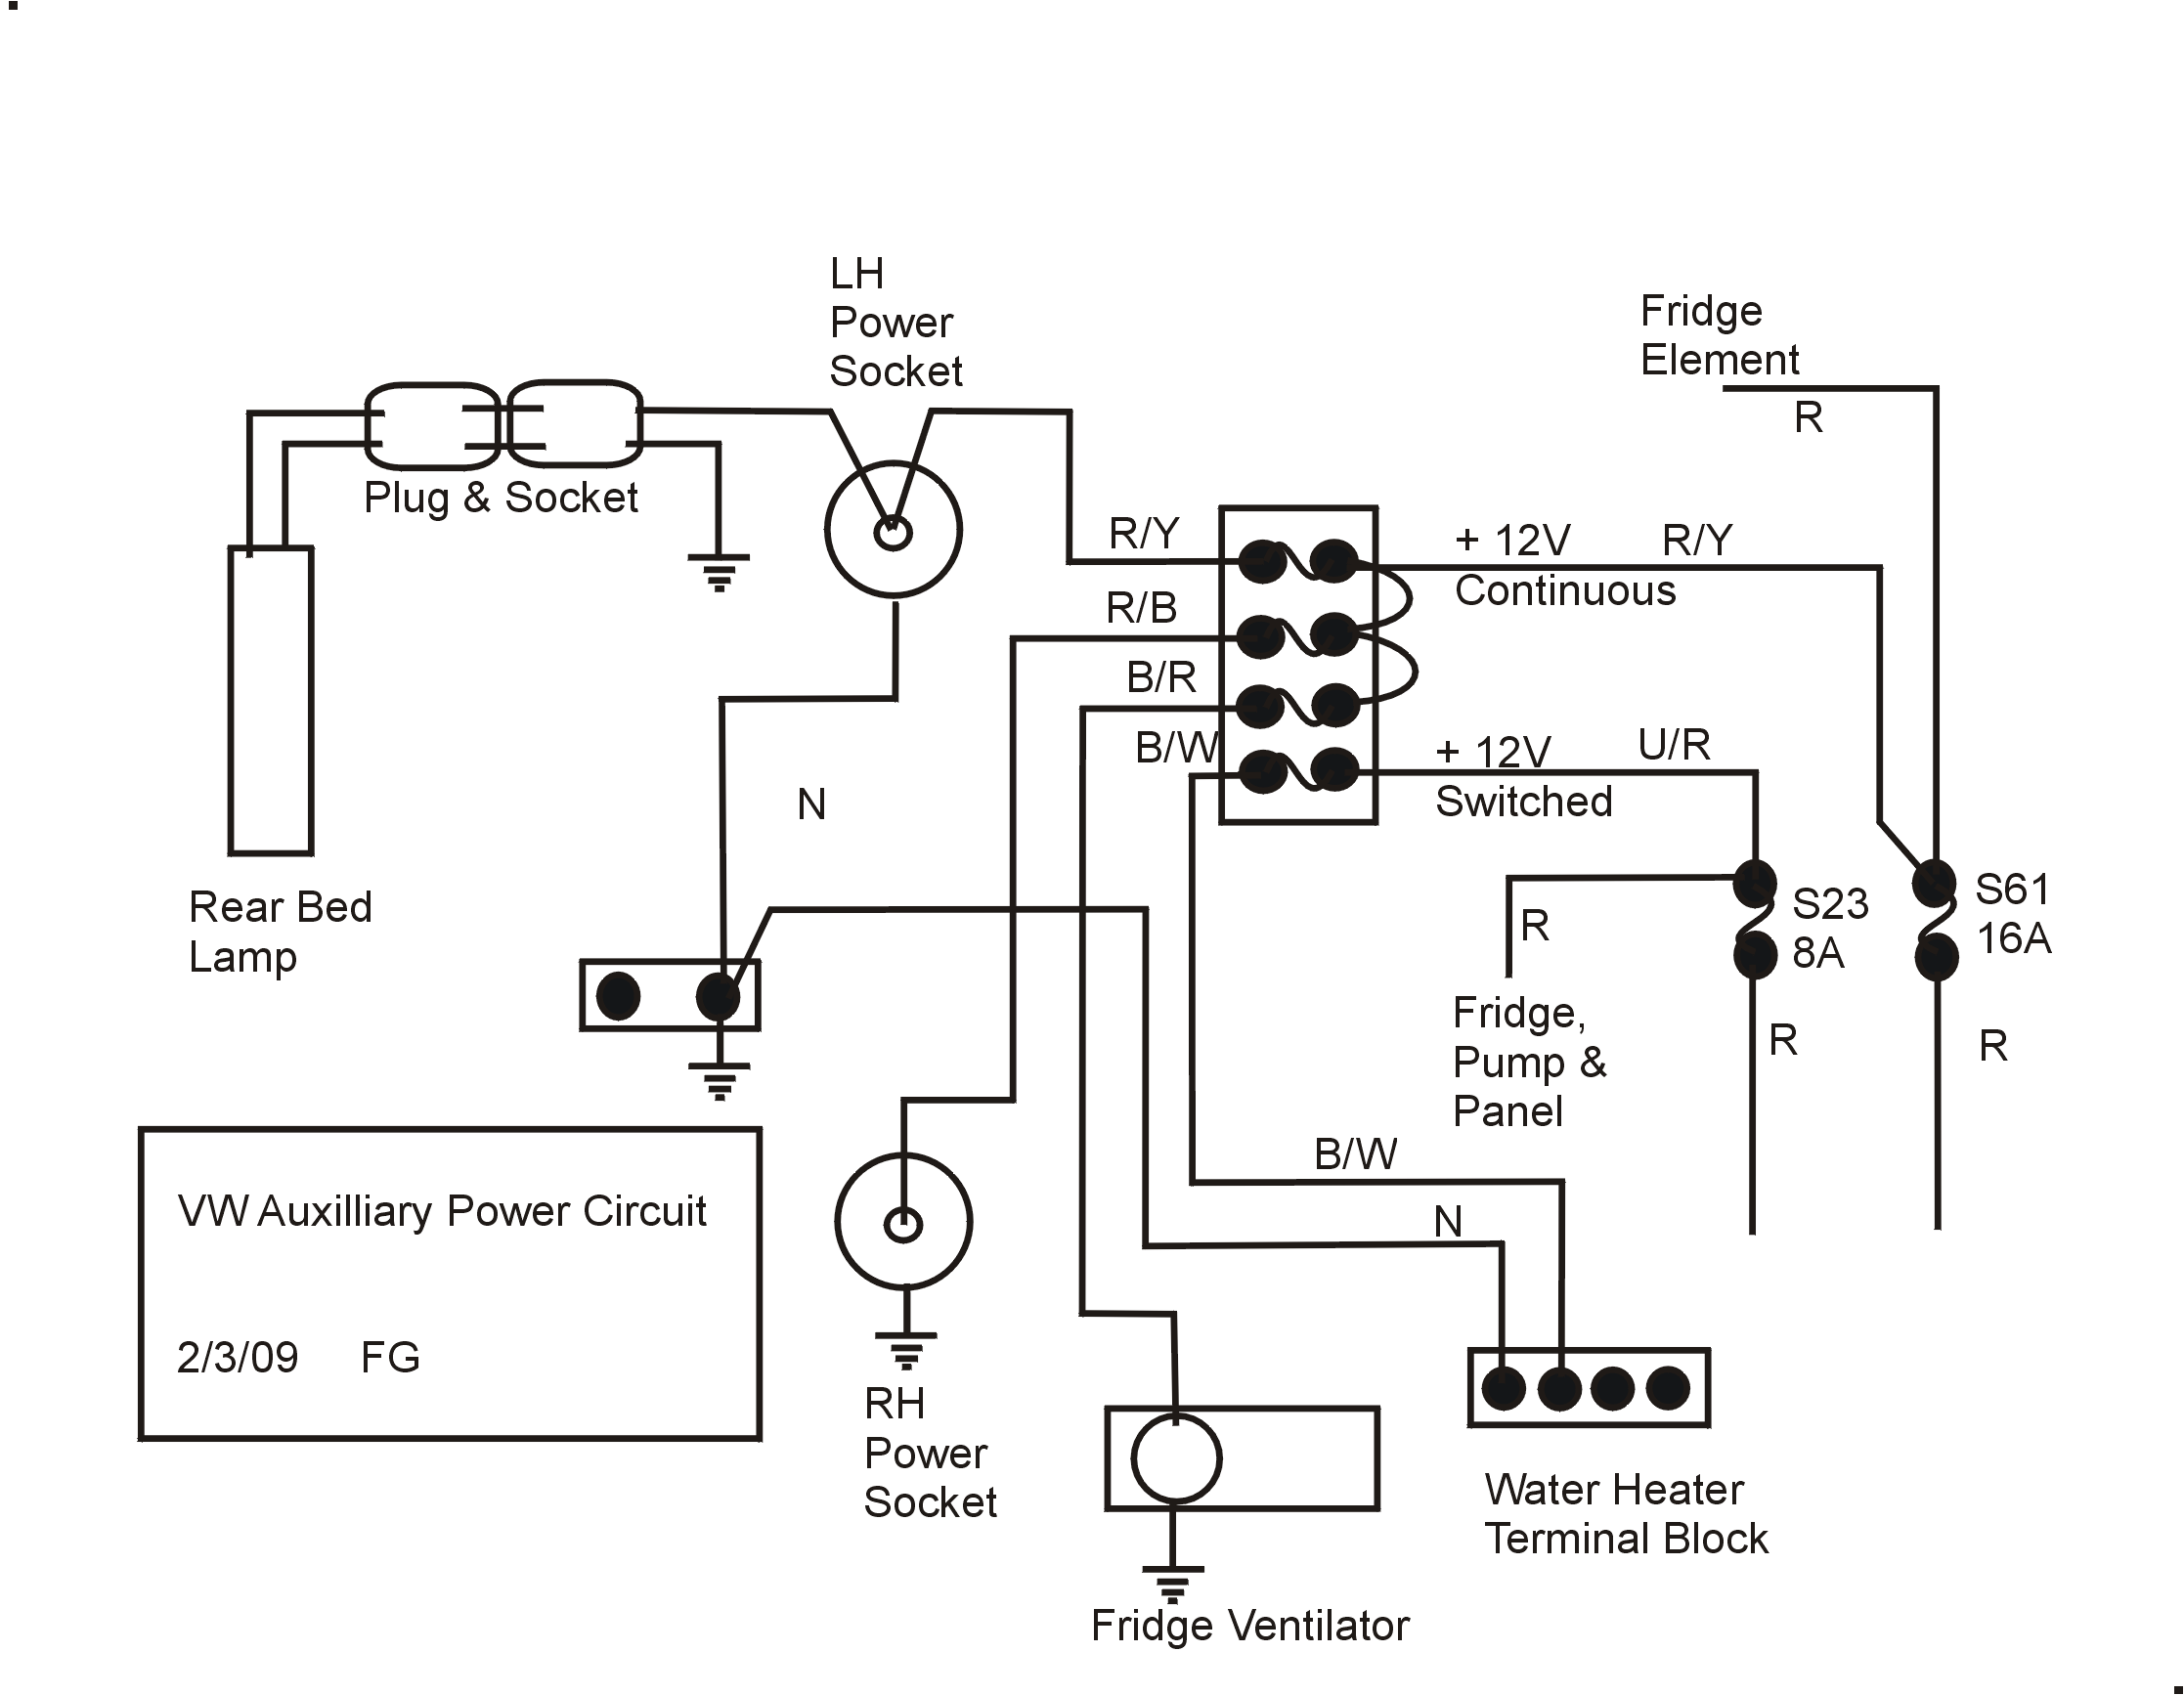
The Power Circuit
The First Socket
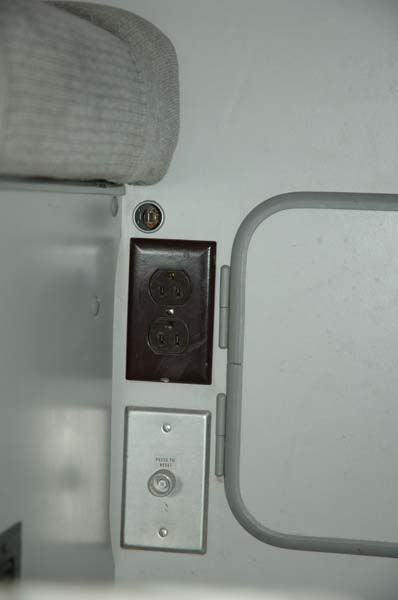
The most convenient place for one extra socket seemed to be near the 110V outlet and circuit breaker.
The Second Socket
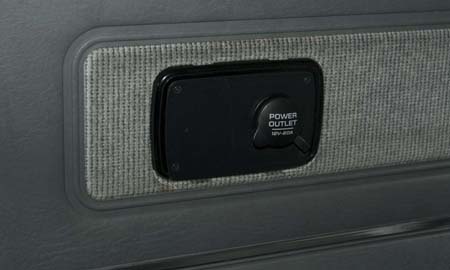
A second socket was mounted in the ash tray holder on the passenger side. Wiring was run under the bench seat. A piece of black textured plastic was shaped to fit the opening where the ash tray had been. It was drilled and screwed to the original fixture. A large hole was drilled in the back of the fixture to allow the socket to extend out the back.
Each socket is fused separately.
Another socket was wired from the original cigarette lighter in the dash, and located on the left side of the steering column cover. This is used for a GPS receiver, leaving the original for iPod, phone charger and the like.
Extra Lights
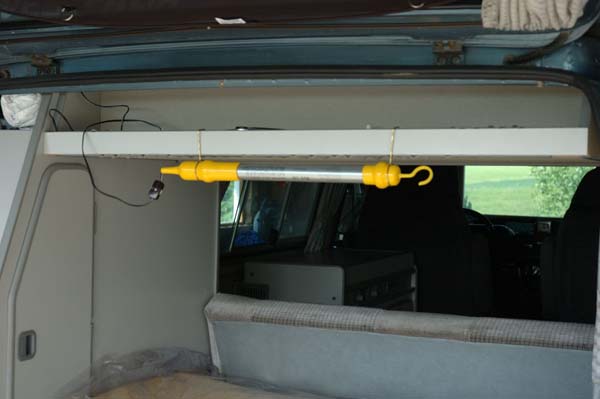
Reading Lamp
A 12Volt 13Watt cold flourescent trouble lamp was used for a bed-time reading lamp. Wire clips wrapped around the plastic ends hook over the ledge. The lamp came with battery clips and lighter plug. The clips were cut off and an inline switch added. Wiring was routed behind the hanging wardrobe from the 4 fuse subpanel.
When the lamp is not needed it sits inside the ledge above. It still has enough cable to allow it to be used as a roadside trouble lamp.
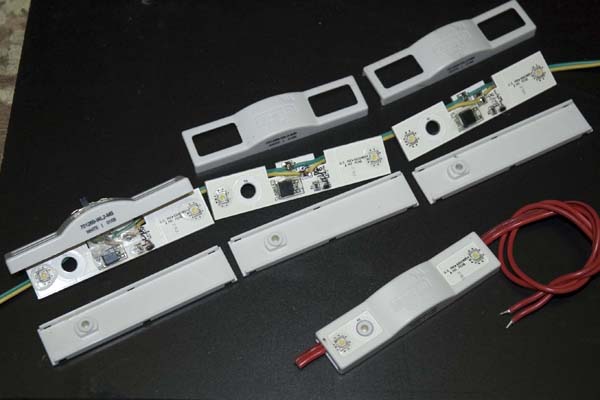
The Bits of the LED Lamps
These are LED lights originally for use in "neon" signs. Signmakers no longer use neon tube lamps, but rather strings of super bright LEDs. Each one contains 2 superbright LEDs and a voltage regulator and can be connected directly to 12V.
Three of them were wired in parallel, switched by a small ON-OFF switch on the end one.
The original configuration is at the bottom of the picture.
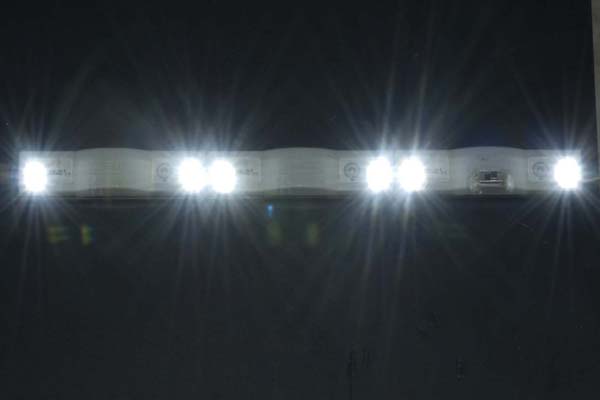
LED Lamp Output
The output is not as condensed as found in other lamps, but it was an interesting project and it works satisfactorily at least until something else can be found at the right price.